在上一篇文章教程里如何下载和安装sing-box,并开机自启:
最新sing-box搭建Hysteria2以及设置端口跳跃(上)
接下来的教程搭建Hy2节点,首先需要编辑一下配置文件信息,在编辑之前,
安装sing-box
首先更新软件源和依赖:
apt update && apt -y install wget tar socat预编译版下载地址:
https://github.com/SagerNet/sing-box/releases github.com/SagerNet/sing-box/releases
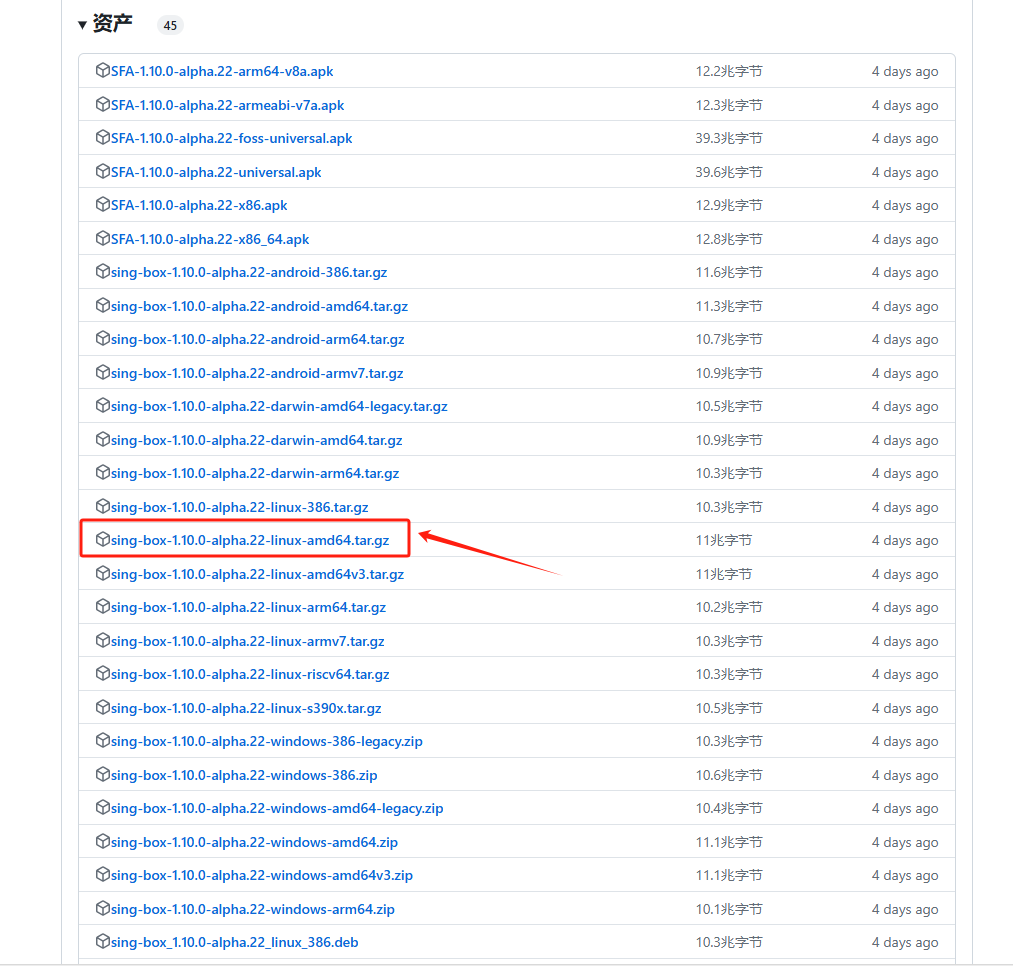
- AMD 内核
wget -c "https://github.com/SagerNet/sing-box/releases/download/v1.10.0-alpha.22/sing-box-1.10.0-alpha.22-linux-amd64.tar.gz" -O - | tar -xz -C /usr/local/bin --strip-components=1 && chmod +x /usr/local/bin/sing-box创建sing-box 文件夹,用于保存配置文件
mkdir /usr/local/etc/sing-box找到sing-box文件夹里,新建一个文件,文件名为 .json,然后打开
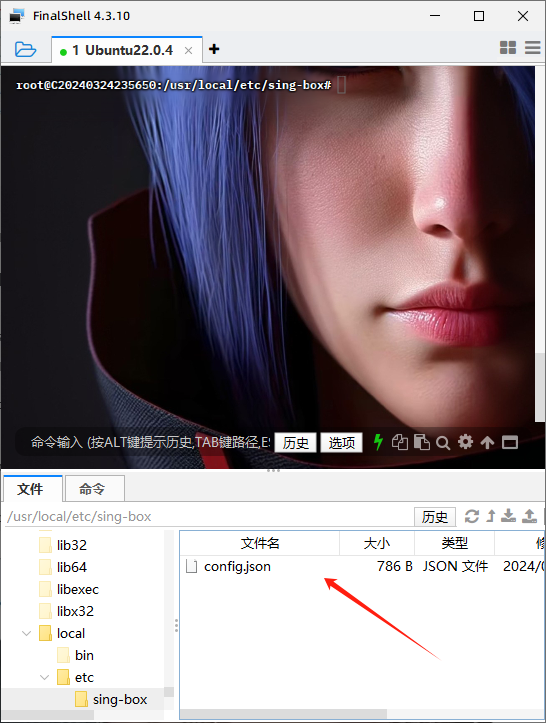
把以下的配置信息粘贴进去:
{
  "log": {
    "disabled": false,
    "level": "info",
    "timestamp": true
  },
  "inbounds": [
    {
      "type": "hysteria2",
      "tag": "hy2-in",
      "listen": "::",
      "listen_port": 5353,
      "up_mbps": 100,
      "down_mbps": 100,
      "users": [
        {
		  "name": "tobyxdd",
          "password": "goofy_ahh_password"
        }
      ],
      "ignore_client_bandwidth": false,
      "masquerade": "https://www.bing.com",
      "tls": {
        "enabled": true,
		"server_name": "aaa.ooddg.one",
        "alpn": ["h3"],
        "certificate_path": "/etc/ssl/private/cert.crt",
        "key_path": "/etc/ssl/private/private.key"
      }
    }
  ],
  "outbounds": [
    {
      "type": "direct",
      "tag": "direct-out"
    }
  ]
}
接下来配置证书
- 安装acme
curl -s https://get.acme.sh | sh -s email=example@gmail.com- 设置 acme 别名
alias acme.sh=~/.acme.sh/acme.sh- 设置 acme 的默认 CA
acme.sh --set-default-ca --server letsencrypt- 生成证书(将aaa.ooddg.one替换为你的域名)
acme.sh --issue -d aaa.ooddg.one --standalone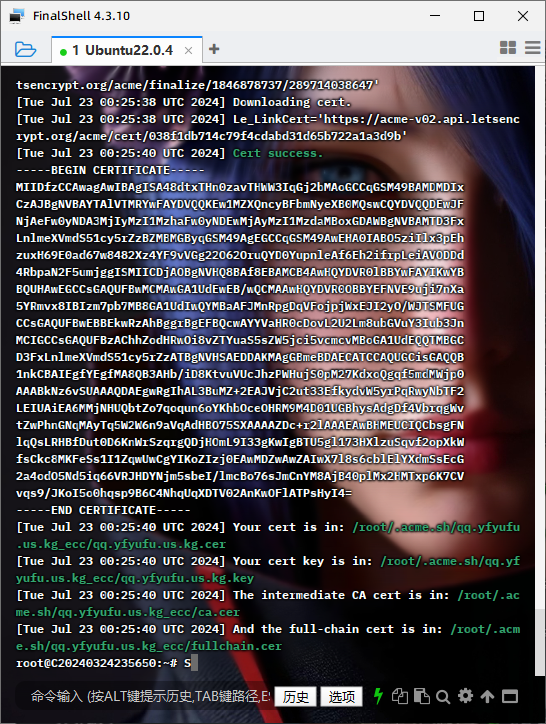
- 安装证书(将aaa.ooddg.one替换为你的域名)
acme.sh --install-cert -d aaa.ooddg.one --ecc --key-file /etc/ssl/private/private.key --fullchain-file /etc/ssl/private/cert.crt启动并运行sing-box
systemctl daemon-reload && systemctl enable --now sing-box && systemctl status sing-box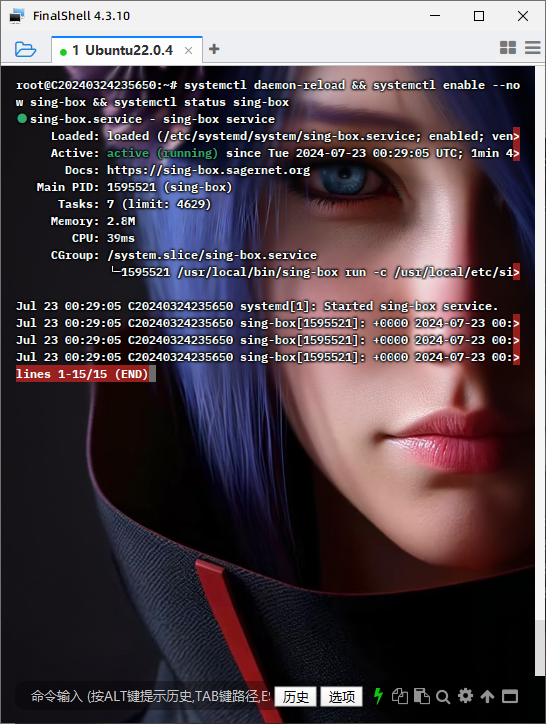
如果遇到报错检查一下证书的路径是否与配置文件的一致:
/usr/local/bin/sing-box run -c /usr/local/etc/sing-box/config.json可以先停止sing-box,再次运行检查一次,
systemctl stop sing-box再次运行检查一次,
/usr/local/etc/sing-box/config.json没再报错后再启动sing-box
systemctl start sing-box查看sing-box的状态:
systemctl status sing-box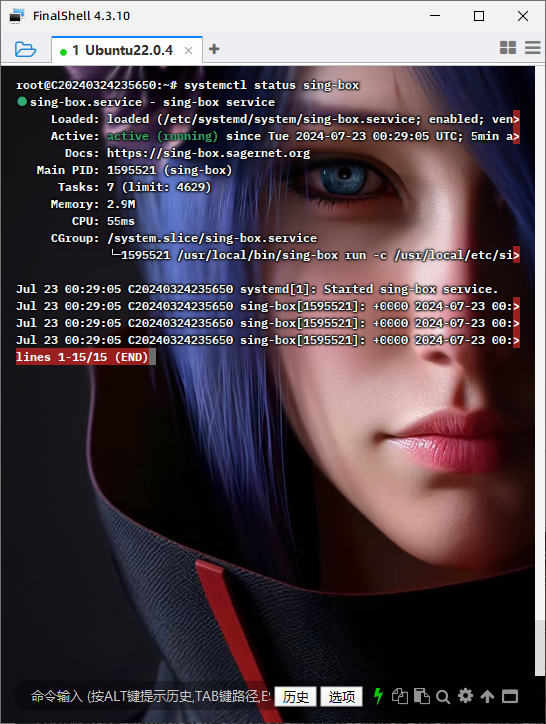
配置 sing-box 的 systemd 开机自启服务
sudo nano /etc/systemd/system/sing-box.service[Unit]
Description=sing-box service
Documentation=https://sing-box.sagernet.org
After=network.target nss-lookup.target
[Service]
CapabilityBoundingSet=CAP_NET_ADMIN CAP_NET_BIND_SERVICE CAP_SYS_PTRACE CAP_DAC_READ_SEARCH
AmbientCapabilities=CAP_NET_ADMIN CAP_NET_BIND_SERVICE CAP_SYS_PTRACE CAP_DAC_READ_SEARCH
ExecStart=/usr/local/bin/sing-box run -c /usr/local/etc/sing-box/config.json
ExecReload=/bin/kill -HUP $MAINPID
Restart=on-failure
RestartSec=10s
LimitNOFILE=infinity
[Install]
WantedBy=multi-user.target将上述内容粘贴进去,然后保存并退出
重新加载 systemd 服务并启动 sing-box 服务
sudo systemctl daemon-reload
sudo systemctl start sing-box
sudo systemctl enable sing-box
sudo systemctl status sing-box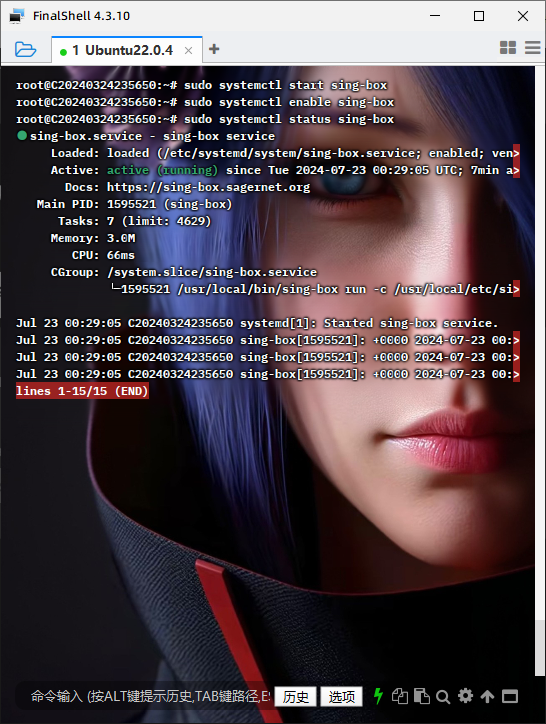
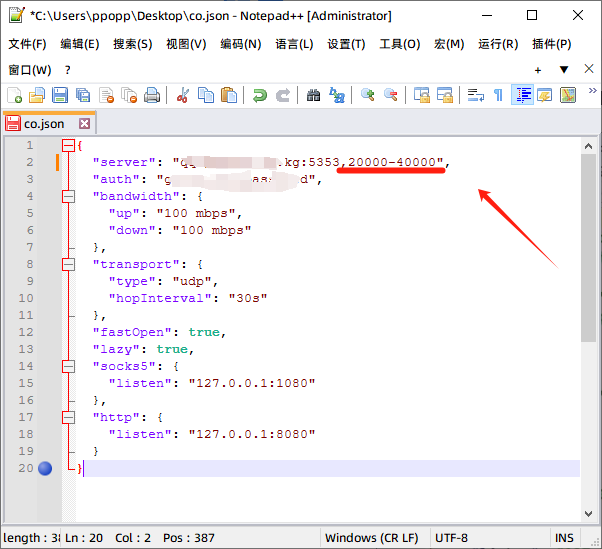
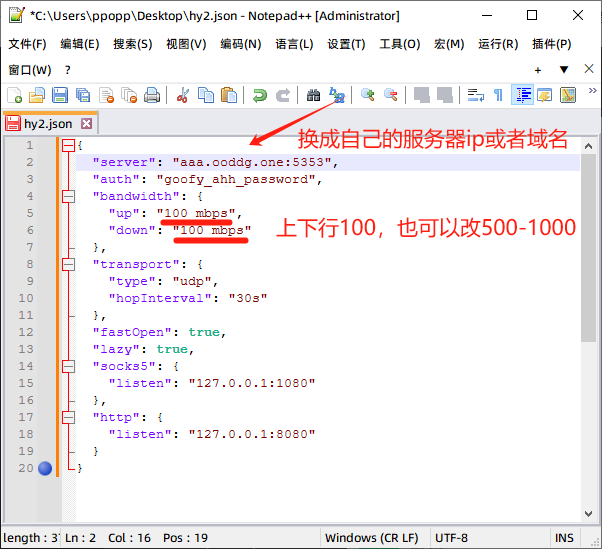
接下来配置客户端和添加端口跳跃:桌面上新建一个文本文档,后缀名为.json
{
  "server": "domain.com:5353",
  "auth": "goofy_ahh_password",
  "bandwidth": {
    "up": "100 mbps",
    "down": "100 mbps"
  },
  "transport": {
    "type": "udp",
    "hopInterval": "30s"
  },
  "fastOpen": true,
  "lazy": true,
  "socks5": {
    "listen": "127.0.0.1:1080"
  },
  "http": {
    "listen": "127.0.0.1:8080"
  }
}
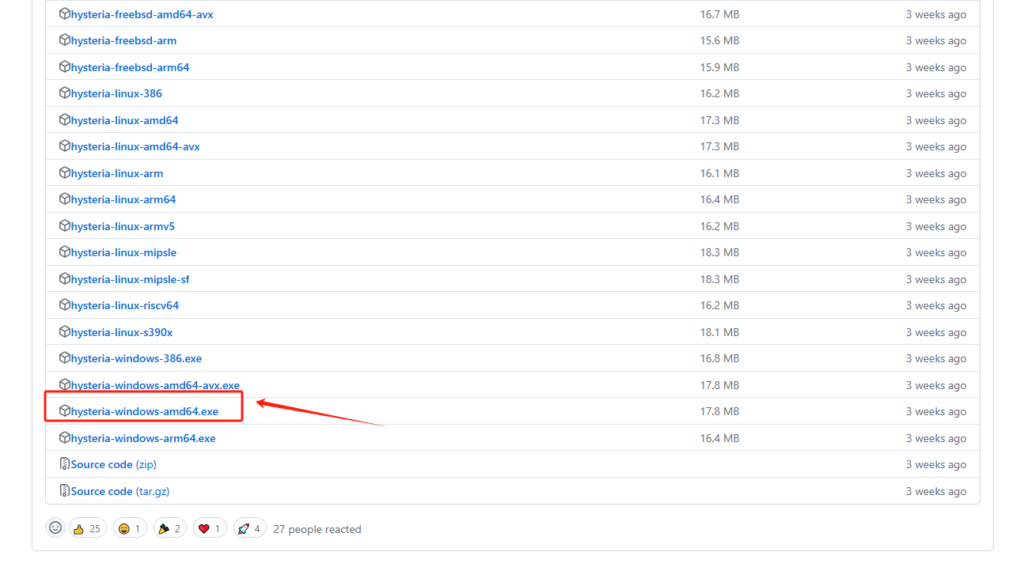
接下来下载Hysteria2最新版本内核:
Releases · apernet/hysteria (github.com)
v2rayN下载:
Releases · 2dust/v2rayN (github.com)
下载 Windows 客户端程序 hysteria-windows-amd64.exe,替换到 v2rayN\bin\hysteria 文件夹里,
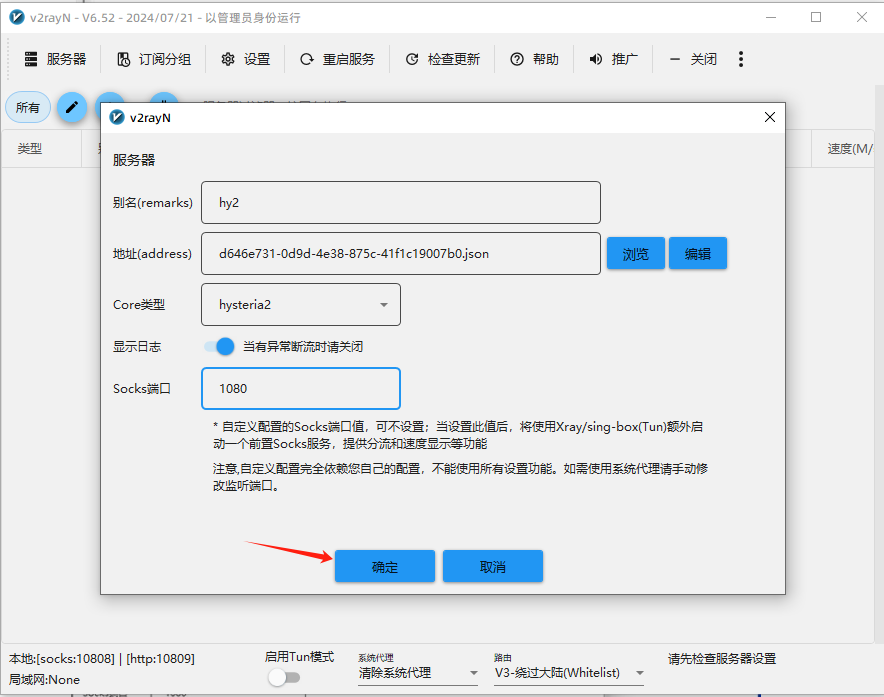
打开 v2rayN,依次点击“服务器”→“添加自定义服务器”
导入客户端的配置文件,后设置为活动服务器!
下面是关于Hysteria端口跳跃设置:
Debian&&Ubuntu系统的
安装iptables-persistent
apt install iptables-persistent清空默认规则
iptables -F清空自定义规则
iptables -X允许本地访问
iptables -A INPUT -i lo -j ACCEPT开放SSH端口(假设SSH端口为22)
iptables -A INPUT -p tcp --dport 22 -j ACCEPT开放HTTP端口
iptables -A INPUT -p tcp --dport 80 -j ACCEPT开放UDP端口(5353替换为节点的监听端口)
iptables -A INPUT -p udp --dport 5353 -j ACCEPT开放UDP端口范围(假设UDP端口范围为20000-40000)
iptables -A INPUT -p udp --dport 20000:40000 -j ACCEPT允许接受本机请求之后的返回数据
iptables -A INPUT -m state --state RELATED,ESTABLISHED -j ACCEPT其他入站一律禁止
iptables -P INPUT DROP允许所有出站
iptables -P OUTPUT ACCEPT查看开放的端口
iptables -L添加NAT规则,20000:40000替换为你设置端口跳跃的范围,5353替换为你节点的监听端口
iptables -t nat -A PREROUTING -p udp --dport 20000:40000 -j DNAT --to-destination :5353查看NAT规则
iptables -t nat -nL --line保存iptables规则
netfilter-persistent save以下是对CentOS系统的:
安装iptables-service
yum install iptables-services启用iptables服务
systemctl enable iptables启动iptables服务
systemctl start iptables清空默认规则
iptables -F清空自定义规则
iptables -X允许本地访问
iptables -A INPUT -i lo -j ACCEPT开放SSH端口(假设SSH端口为22)
iptables -A INPUT -p tcp --dport 22 -j ACCEPT开放HTTP端口
iptables -A INPUT -p tcp --dport 80 -j ACCEPT开放UDP端口(5353替换为节点的监听端口)
iptables -A INPUT -p udp --dport 5353 -j ACCEPT开放UDP端口范围(假设UDP端口范围为20000-40000)
iptables -A INPUT -p udp --dport 20000:40000 -j ACCEPT允许接受本机请求之后的返回数据
iptables -A INPUT -m state --state RELATED,ESTABLISHED -j ACCEPT其他入站一律禁止
iptables -P INPUT DROP允许所有出站
iptables -P OUTPUT ACCEPT查看开放的端口
iptables -L添加NAT规则,20000:40000替换为你设置端口跳跃的范围,5353替换为你节点的监听端口
iptables -t nat -A PREROUTING -p udp --dport 20000:40000 -j DNAT --to-destination :5353查看NAT规则
iptables -t nat -nL --line保存iptables规则
service iptables save最后打开文本文档,重新设置端口跳跃的范围,